Showing posts with label Kitsch. Show all posts

I Bake Stuff Part One: Earl Grey Cupcakes

BlueSo it's Boxing Day, 2010, and as the year draws to a close, I thought I should share a recipe for some super cute, very pretty cupcakes. For these, I used Earl Grey, but if there's a particular type of tea you really like, do feel free to use your favourite blend instead :D
So, this will make about 12 regular sized cupcakes.
125ml Semi-skimmed milk, at room temperature
4 Earl Grey teabags
110g unsalted butter, at room temperature
225g granulated sugar
1/2 teaspoon almond extract (optional)
2 large eggs, free range or organic
125g self-raising flour, sifted
120g plain flour, sifted
To decorate:
110g unsalted butter, at room temperature
60ml semi-skimmed milk, at room temperature
1 teaspoon vanilla extract
500g icing sugar, sifted
Blue and red food colouring, to make lilac
Sugar flowers


1. Preheat the oven to 160oC (fan), 180oC/ 350oF/ gas mark 4, and line a 12-hole muffin tray with the appropriate size cupcake cases.
2. Heat the milk in a saucepan over a medium heat until it just begins to boil. Remove from the heat and add the teabags. Cover with clingfilm and leave to infuse for about 30 minutes, then discard the teabags.
3. In a large mixing bowl, cream the butter and the sugar until the mixture is pale and smoot, which should take 3-5 minutes using an electric hand mixer. Add the almond extract, if you are using it, and the eggs, one at a time, mixing for a few minutes after each addition.
4. Combine the two flours in a separate bowl. Add one-third of the flours to the creamed mixture and beat well. Pour in one-third of the infused milk and beat again. Repeat these steps until all the flour and milk have been added
5. Carefully spoon the mixture into the cupcake cases, filling them to about two-thirds full. Bake in the oven for about 25 minutes until slightly raised and golden brown. To check they are cooked, insert a skewer in the centre of one of the cakes - it should come out clean.
6. Remove from the oven, and leave the cakes in their tins for about 10 minutes, before carefully placing on a wire rack to cool. To create the buttercream icing, beat the butter, milk, vanilla extract and half the icing sugar until smooth in a large mixing bowl. Gradually add the remainder of the icing sugar and beat again until the buttercream is smooth and creamy. Add literally one drop of each food colour, and beat thoroughly until the icing turns a pale lilac colour. Ice your cupcakes in a swirling motion, and add sugar flowers if desired
Et voila! :D

Read More

Sweetheart Rolls: How To

I'm back again, and with another beauty how-to tutorial!
I learned from the experts how to put my hair up in a beautiful 1940s/1950s Sweetheart Roll, special thanks to Lady Lace and Candice De Ville (Super Kawaii Mama). So I wanted to share this lovely hairstyle with you all.

You will need:
U-shaped hairpins
Hairgrips (Flat, if possible)
One hairband
Corsage/decorative slide/headscarf (See Rosie The Riverter post)
Firm hold hairspray

Step One:
Part your hair down the middle, and, starting with the right hand side, take a section about a palm-width into the air. Wind the ends downwards, going back on the hair, around two fingers, then remove your fingers and continue to wind down.

Step Two:
Once you've created a tube-shaped roll that meets the top of the head, hold in place and secure with about two flat hairgrips through the centre of the roll. Fix with plenty of hairspray, and lightly pin down any stray sections of hair. Repeat with the left hand side, making sure that both the rolls "meet" in the middle, and are as even as possible. Fix with lots of hairspray, to ensure that this stays as neat as possible

Step Three:
Brush out the rest of the hair as thoroughly as possible, but take care not to tug at the rolls. Now, this step requires you to be a little dextrous, but don't worry too much, it's still fairly simple. Gather the hair into a low ponytail, and secure reasonably tightly with the hairband, however, leave some slack. 

Step Four:
Reaching above the hairband, gently pull the hair above the hairband apart, creating a small hole. Twist the ponytail a couple of times, and then gently feed through the hole around three or four times until no hair remains dangling down. Secure with both grips and U-shaped pins. You may need quite a few of these, as this is the only support this part of the roll will have. As before, fix with plenty of hairspray.

Step Five:
Now, this is the fun part - the decoration! If you are using a corsage, gently push it into your hair just above your ear, so it lightly sits in line with your eye. If you are using a decorative slide, gently push it down into the top of the bottom roll, taking care not to dislodge it. If you are using a headscarf, roll the scarf into a sausage shape, and gently tie at one side of the head in a small, neat bow. Use hairgrips to secure any loose sections, and this will help to keep the scarf in place.

And there you go! A simple, beautiful hairstyle that takes virtually no time! It's so versatile, all you have to do is vary the decoration to fit the event.

You can't really see the corsage here, but this photo demonstrates how flattering the hairstyle can be

Better view of the corsage (:


Read More

Tie A Headscarf "Rosie The Riverter" Style! (Hair Tutorial No.1)

Right then, my lovely ladies, today I'm going to teach you how to tie a headscarf in the style of the lovely Rosie The Riverter, face of many 1940s propaganda posters. It can be a little fiddly if you choose a silk scarf, but, in the words of the riveting Rosie; "We Can Do It!"

You will need:
One large headscarf, preferably cotton
Some hairgrips, the same colour as your hair

Step one:
Hold out your headscarf in front of you, so it's a large square of cotton. Then, fold it in half diagonally, until you're left with a triangle of fabric. This will give you your basic headscarf shape.

Step two:
Place the scarf over your shoulders, with the point facing downwards. Then, taking either end in each hand, bring the edges up to the top of your head, and tie in a knot in the middle, about where your parting is.

Step three:
Take the point originally facing downwards in your fingertips, and pull it upwards until the very end of the point sits just on top of the knot you've just made. Make sure all your excess hair is caught in the pouch that this creates, and re-tie the ends, trapping the pouch into the bow.

Step four: 
Now that you've got your basic Rosie The Riverter updo, all you need to do is make sure that any excess scarf is pinned into place with hairgrips. For best results, let a small amount of hair peek out of the front of the scarf, creating a cute, retro, peek-a-boo look. Ta-Da!
Photos will be up shortly to ensure a good visual tutorial! 

Read More

Presents!

So I was in Exeter a little while ago with Piers, and we were looking in this lovely little shop full of second-hand stuff called N.E.Tings, and they had a sale on of old piggy banks, all for 20p each! They were all so cute, but none had stoppers in the bottoms. This didn't matter though, and Piers got me a cute little pink one! I thought I should share this, since Percy the Piggy's so very cute and lovely :)

"Let's get you a piggy bank then" :) It made me very, very happy :)

                                              Coin slot!
I love how delighted he looks! :)


Read More

Sweet!

Sweet!
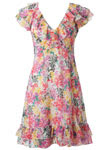
Such a cute cream ditsy print dress :)